-
[.NET] ASP.NET Core MVC에 View 영역을 Vite 프로젝트로 개발할 수 있게 도와주는 Vite.AspNetCore 소개.NET/유용한 라이브러리 2024. 7. 13. 20:02반응형
Vite를 기반으로한 웹 프론트엔드 개발시, Next.js, Nuxt.js 가 아닌 ASP.NET Core 웹 프레임워크에 사용해야할 때 유용한 라이브러리이다.
https://github.com/Eptagone/Vite.AspNetCore
GitHub - Eptagone/Vite.AspNetCore: Small library to integrate Vite into ASP.NET projects
Small library to integrate Vite into ASP.NET projects - Eptagone/Vite.AspNetCore
github.com
라이브러리 추가 후 프로젝트에 몇 가지 작업이 필요한데, 브랜치 내 examples를 참고하면 된다. 필자의 경우는 vue 기반의 MPA 형식의 웹 서비스 개발을 목적으로 아래와 같이 작업하였다. example에 없다고 하여 지원이 안되는 건 아니니 설정값을 참고하여 자신만의 프로젝트 템플릿을 만들어도 좋을 듯 하다.
1. MVC 프로젝트 및 vite-project 생성
MVC 프로젝트를 생성한 후 vite-project를 생성한다. 그 뒤 파일 일부를 이동시켜야 한다.
- package.json, package-lock.json, tsconfig.json, vite.config.ts 파일은 csproj 파일과 같은 위치로 옮긴다.
- assets, components, public, src 경로 및 css, ts, js등의 파일들은 프로젝트 하위 Assets 폴더를 생성하여 추가한다.
Assets 경로가 마음에 안든다면 후속 작업인 vite.config.ts 편집을 참고하여 수정해도 된다.
html 파일은 기본적으로 필요없으며, 기본 생성된 app.vue 파일도 신규 생성할 것이므로 제거해도 된다.2. 웹 프로젝트 파일(.csproj) 파일 편집
라이브러리 추가 후 ItemGroup 및 Target 을 아래와 같이 추가한다.
<Project Sdk="Microsoft.NET.Sdk.Web">

  <PropertyGroup>
    <TargetFramework>net8.0</TargetFramework>
    <Nullable>enable</Nullable>
    <ImplicitUsings>enable</ImplicitUsings>
  </PropertyGroup>

  <ItemGroup>
    <PackageReference Include="Vite.AspNetCore" Version="2.1.1" />
  </ItemGroup>

  <ItemGroup>
    <Content Remove="package-lock.json" />
    <Content Remove="package.json" />
    <Content Remove="tsconfig.json" />
    <Content Remove="tsconfig.app.json" />
    <Content Remove="tsconfig.node.json" />
    <!-- Don't remove this line or your manifest.json won't be copied on publish -->
    <Content Include="wwwroot\.vite\**" />
  </ItemGroup>

  <ItemGroup>
    <None Include="package-lock.json" />
    <None Include="package.json" />
    <None Include="tsconfig.json" />
    <None Include="tsconfig.app.json" />
    <None Include="tsconfig.node.json" />
  </ItemGroup>

  <!-- Ensure Node environment on Build -->
  <Target Name="DebugEnsureNodeEnv" BeforeTargets="Build;PublishBuildAssets" Condition=" !Exists('node_modules') ">
    <!-- Ensure Node.js is installed -->
    <Exec Command="node --version" ContinueOnError="true">
      <Output TaskParameter="ExitCode" PropertyName="ErrorCode" />
    </Exec>
    <Error Condition="'$(ErrorCode)' != '0'" Text="Node.js is required to build and run this project. To continue, please install Node.js from https://nodejs.org/, and then restart your command prompt or IDE." />
    <Message Importance="high" Text="Restoring dependencies using 'npm'. This may take several minutes..." />
    <!-- Install Node packages -->
    <Exec Command="npm install" />
  </Target>

  <!-- Build the final assets -->
  <Target Name="PublishBuildAssets" BeforeTargets="Build" Condition=" '$(Configuration)' == 'Release' ">
    <!-- Build the final assets -->
    <Exec Command="npm run build" />
  </Target>
</Project>
3. vite.config.ts 편집
import { UserConfig, defineConfig } from 'vite'
import { spawn } from 'child_process'
import fs from 'node:fs'
import path from 'node:path'

import vue from '@vitejs/plugin-vue'

// Get base folder for certificates.
const baseFolder =
    process.env.APPDATA !== undefined && process.env.APPDATA !== ''
        ? `${process.env.APPDATA}/ASP.NET/https`
        : `${process.env.HOME}/.aspnet/https`;

// Generate the certificate name using the NPM package name
const certificateName = process.env.npm_package_name;

// Define certificate filepath
const certFilePath = path.join(baseFolder, `${certificateName}.pem`);
// Define key filepath
const keyFilePath = path.join(baseFolder, `${certificateName}.key`);

// Export Vite configuration

// https://vitejs.dev/config/
// Export Vite configuration
export default defineConfig(async () => {
  // Ensure the certificate and key exist
  if (!fs.existsSync(certFilePath) || !fs.existsSync(keyFilePath)) {
      // Wait for the certificate to be generated
      await new Promise<void>((resolve) => {
          spawn('dotnet', [
              'dev-certs',
              'https',
              '--export-path',
              certFilePath,
              '--format',
              'Pem',
              '--no-password',
          ], { stdio: 'inherit', })
              .on('exit', (code) => {
                  resolve();
                  if (code) {
                      process.exit(code);
                  }
              });
      });
  };

  // Define Vite configuration
  const config: UserConfig = {
      plugins: [vue()],
      appType: 'custom',
      root: 'Assets',
      publicDir: 'public',
      build: {
          emptyOutDir: true,
          manifest: true,
          outDir: '../wwwroot',
          assetsDir: '',
          rollupOptions: {
              input: ['Assets/views/index.ts', 'Assets/views/privacy.ts'],
              output: {
                    entryFileNames: '[name].js',
                    chunkFileNames: 'chunks/[name]-[hash].js',
                    assetFileNames: 'assets/[name]-[hash].[ext]',
              }
          },
      },
      server: {
          strictPort: true,
          https: {
              cert: certFilePath,
              key: keyFilePath
          }
      },
      optimizeDeps: {
          include: []
      }
  }

  return config;
});
4. C# 및 cshtml 영역 수정
기존 MVC 뷰(View)영역을 Vue로 대체하기 위해 아래와 같이 파일들을 생성 및 편집한다.
Program.cs
using Vite.AspNetCore;

var builder = WebApplication.CreateBuilder(args);

// Add services to the container.
builder.Services.AddControllersWithViews();
builder.Services.AddViteServices(option => {
    option.Server.AutoRun = true;
    option.Server.Https = true;
});

var app = builder.Build();

// Configure the HTTP request pipeline.
if (!app.Environment.IsDevelopment())
{
    app.UseExceptionHandler("/Home/Error");
    // The default HSTS value is 30 days. You may want to change this for production scenarios, see https://aka.ms/aspnetcore-hsts.
    app.UseHsts();
}

app.UseHttpsRedirection();
app.UseStaticFiles();

if (app.Environment.IsDevelopment())
{
    app.UseWebSockets();
    app.UseViteDevelopmentServer(true);
}

app.UseRouting();

app.UseAuthorization();

app.MapControllerRoute(
    name: "default",
    pattern: "{controller=Home}/{action=Index}/{id?}");

app.Run();
Views/_ViewImports.cshtml
@using Template.AspNetCore.MVC.Vue
@using Template.AspNetCore.MVC.Vue.Models
@addTagHelper *, Microsoft.AspNetCore.Mvc.TagHelpers
@addTagHelper *, Vite.AspNetCore
Views/Shared/_Layout.cshtml
<!DOCTYPE html> <html lang="en"> <head> <meta charset="utf-8" /> <link rel="icon" type="image/svg+xml" href="~/vite.svg" /> <meta name="viewport" content="width=device-width, initial-scale=1.0" /> <title>@ViewData["Title"] - Template.AspNetCore.MVC.Vue</title> @await RenderSectionAsync("Styles", required: false) </head> <body> <header> <nav class="navbar"> <ul> <li class="nav-item btn"> <a class="nav-link text-dark" asp-area="" asp-controller="Home" asp-action="Index">Home</a> </li> <li class="nav-item btn"> <a class="nav-link text-dark" asp-area="" asp-controller="Home" asp-action="Privacy">Privacy</a> </li> </ul> </nav> </header> @RenderBody() <footer> <div class="container"> © 2024 - Template.AspNetCore.MVC.Vue - <a asp-area="" asp-controller="Home" asp-action="Privacy">Privacy</a> </div> </footer> @await RenderSectionAsync("Scripts", required: false) </body> </html>Views/Home/Index.cshtml
@{
    ViewData["Title"] = "Home Page";
}

@* This line includes the style from the "index.ts" entrypoint *@
@section Styles {
	<link rel="stylesheet" vite-href="~/views/index.ts" asp-append-version="true" />
}
<main role="main" id="app">
</main>

<!-- This line includes your "index.ts" entrypoint -->
<script type="module" vite-src="~/views/index.ts"></script>
Views/Home/Privacy.cshtml
@{
    ViewData["Title"] = "Privacy Page";
}

@* This line includes the style from the "privacy.ts" entrypoint *@
@section Styles {
	<link rel="stylesheet" vite-href="~/views/privacy.ts" asp-append-version="true" />
}
<main role="main" id="app">
</main>

<!-- This line includes your "privacy.ts" entrypoint -->
<script type="module" vite-src="~/views/privacy.ts"></script>
5. Vue 영역 수정
Assets/views/index.ts
import 'vite/modulepreload-polyfill';
import { createApp } from 'vue'
import '../style.css'
import IndexApp from './Index.vue'

createApp(IndexApp).mount('#app')
Assets/views/index.vue
<script setup lang="ts">
import HelloWorld from '../components/HelloWorld.vue'
</script>

<template>
  <div>
    <a href="https://vitejs.dev" target="_blank">
      <img src="/vite.svg" class="logo" alt="Vite logo" />
    </a>
    <a href="https://vuejs.org/" target="_blank">
      <img src="../assets/vue.svg" class="logo vue" alt="Vue logo" />
    </a>
  </div>
  <HelloWorld msg="Vite + Vue" />
</template>

<style scoped>
.logo {
  height: 6em;
  padding: 1.5em;
  will-change: filter;
  transition: filter 300ms;
}
.logo:hover {
  filter: drop-shadow(0 0 2em #646cffaa);
}
.logo.vue:hover {
  filter: drop-shadow(0 0 2em #42b883aa);
}
</style>
Assets/views/privacy.ts
import 'vite/modulepreload-polyfill';
import { createApp } from 'vue'
import '../style.css'
import PrivacyApp from './Privacy.vue'

createApp(PrivacyApp).mount('#app')
Assets/views/Privacy.vue
<script setup lang="ts">
</script>

<template>
  <div>
    Privacy
  </div>
</template>

<style scoped>
.logo {
  height: 6em;
  padding: 1.5em;
  will-change: filter;
  transition: filter 300ms;
}
.logo:hover {
  filter: drop-shadow(0 0 2em #646cffaa);
}
.logo.vue:hover {
  filter: drop-shadow(0 0 2em #42b883aa);
}
</style>
구성완료 후 dotnet run 실행시 npm run dev 명령어도 같이 실행되는데, 실제 웹 페이지에 vue 랜더링 결과는 없고 View 화면값만 나온다면 개발환경 https 사용에 의한 인증서 문제로 안될 수 있다.
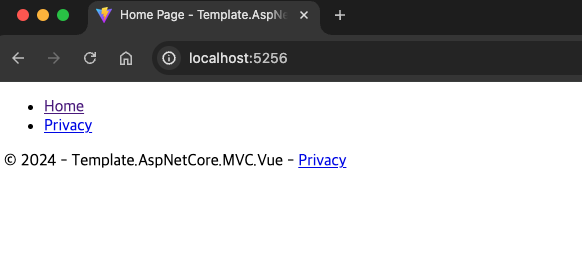
그럴 경우 npm run dev 로 실행된 dev 서버 URL로 접속한 뒤 `localhost(안전하지 않음)`으로 이동하여 허용하면 된다.

설정 후 캐시를 지워 새로고침하면 정상 표기된다.
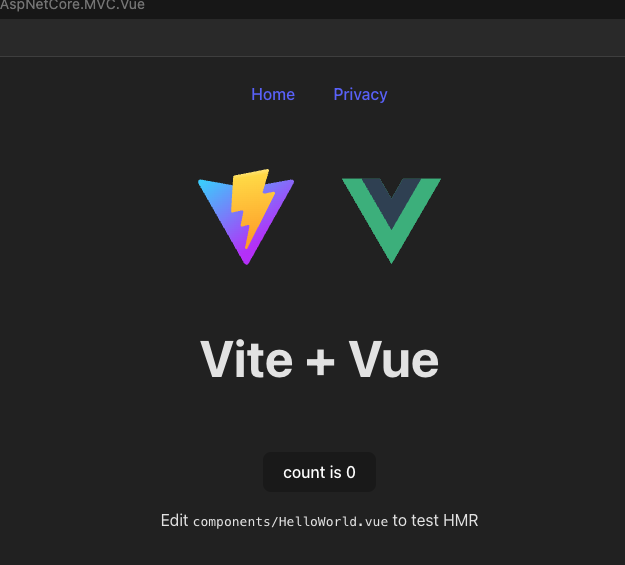
vite의 정식지원이 아닌만큼 완벽하진 않지만, MVC의 프론트영역에 vue를 도입해야 한다면 해당 방법도 도움이 될 것이다.
관련 예제는 개인 github 브랜치에 공개 템플릿 브랜치로 올려두었다.
https://github.com/ddochea0314/Template.AspNetCore.MVC.Vue
GitHub - ddochea0314/Template.AspNetCore.MVC.Vue: MVC + Vue3
MVC + Vue3 . Contribute to ddochea0314/Template.AspNetCore.MVC.Vue development by creating an account on GitHub.
github.com
반응형'.NET > 유용한 라이브러리' 카테고리의 다른 글
[.NET] 유효성(Validation)검사 코드를 간결하게 작성하는데 도움주는 GuardClauses 소개 (0) 2021.09.25 [.NET Tools] 웹 기반 dotnet playground 서비스 sharplab.io (0) 2021.06.05 [.NET] 메모리가 폭발하는 ClosedXML (1) 2021.01.30 [.NET] 상업 목적에서도 무료로 사용할 수 있는 엑셀(Excel) 편집 라이브러리 ClosedXML 소개. (feat. EPPlus 사용시 주의사항) (0) 2021.01.28